This tutorial shows how to install a DHCP server using Powershell.
You can install DHCP on a domain controller or on a separate server. For this tutorial a Windows Server 2016 Standard Edition server has been used without Desktop Experience. The server is a Domain Controller with hostname ‘adds01.lab01.local’ and has ip-address 192.168.20.10.
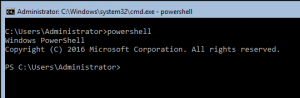
Log in to the server that will become the DHCP server as Domain Administrator. A Command Shell is shown. Type ‘powershell’ and hit enter.
First, install DHCP using the Install-WindowsFeature cmdlet.
Install-WindowsFeature dhcp
Now add the DHCP server to AD DS and authorize it using the Add-DhcpServerInDC cmdlet.
Example:
Add-DhcpServerInDC -DnsName adds01.lab01.local -IPAddress 192.168.20.10
Create the first scope by using the Add-DhcpServerv4Scope cmdlet.
Example:
Add-DhcpServerv4Scope -Name Scope01 -StartRange 192.168.20.100 -EndRange 192.168.20.149 -SubnetMask 255.255.255.0
To show the DHCP scope, use the Get-DhcpServerv4Scope cmdlet.
Example:
Get-DhcpServerv4Scope
Remember the ScopeId, because you will need this when you want to add options to the scope.
Now add some basic options to the scope using the Set-DhcpServerv4OptionValue cmdlet. For this example, set the dnsdomain, dnsserver and the router values.
Example:
Set-DhcpServerv4OptionValue -ScopeId 192.168.20.0 -DnsDomain lab01.local -DnsServer 192.168.20.10 -Router 192.168.20.254
If you don’t specify the ScopeId, the Option Values will be Server Options instead of Scope Options.
The DHCP server installation and configuration has finished. The server can now offer ip-addresses to DHCP clients.