This tutorial shows you how to install and configure a Certificate Authority (CA) using Powershell.
You can install a CA on a domain controller or on a separate server. For this tutorial, let’s install the CA on the domain controller. For this tutorial a Windows Server 2016 Standard Edition server has been used without Desktop Experience.
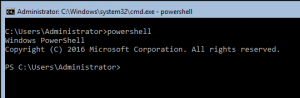
Log in to the server that will become the CA as Domain Administrator. A Command Shell is shown. Type ‘powershell’ and hit enter.
Install the CA using the Install-WindowsFeature cmdlet.
Install-WindowsFeature ADCS-Cert-Authority
Now configure the CA using the Install-AdcsCertificationAuthority. Because this is the first CA it is called a Root CA. It is a best-practice that a Root CA is a Standalone CA (not AD integrated) and not a Enterprise CA, but for this tutorial, let’s install an Enterprise Root CA.
Example:
Install-AdcsCertificationAuthority -CAType EnterpriseRootCA -CryptoProviderName "RSA#Microsoft Software Key Storage Provider" -KeyLength 2048 -HashAlgorithmName SHA256 -ValidityPeriod Years -ValidityPeriodUnits 5 -CACommonName lab01-CA
If you want to request certificates using a website, you need to install Certification Authority Web Enrollment. To do so, first use the Install-WindowsFeature cmdlet.
Example:
Install-WindowsFeature ADCS-Web-Enrollment
To configure the Certificate Authority Web Enrollment, use the Install-AdcsWebEnrollment cmdlet.
Example:
Install-AdcsWebEnrollment
After the Web Enrollment configuration has been completed, browse to http://<servername>/certsrv to request a certificate.